Working with SSL/TLS certificates? Need to verify a certificate chain? Need to create a private key? The following tutorial (a more detailed openssl cheat sheet) shows the most important openssl commands related to certificate tasks.

The basics: Private Key and CSR
Creating a RSA Private Key
When you need to create a new certificate, you first need to create a private key. This first step applies to both self-signed (non-verified) and issued (verified by a known certificate issuer such as Sectigo or Digicert) certificates.
To create a private key, the sub command genrsa is used, followed by an optional password hash (here des3) and the size of the private key (here 2048):
$ openssl genrsa -des3 2048 > geekersdigest.com.keyThe prompt will ask for a pass phrase to protect the private key. This makes sense for additional security, however using this key in a service (such as Apache web server) will require to "unlock" the private key with the passphrase on every service (re-)start.
In this case it makes more sense to create a private key without passphrase protection:
$ openssl genrsa 2048 > geekersdigest.com.keyYou now have a file "geekersdigest.com.key" which is the private key.
Creating a CSR
CSR is short for Certificate Signing Request. A CSR is created from the Private Key and is then further used to create the final certificate.
To create a CSR, the sub command req is used. A new CSR should be created from the existing key file, the output shoud be saved into a file geekersdigest.com.csr.
The CSR creation process asks a couple of questions, related to whom the final certificate should be issued for.
$ openssl req -new -key geekersdigest.com.key -out geekersdigest.com.csr
You are about to be asked to enter information that will be incorporated
into your certificate request.
What you are about to enter is what is called a Distinguished Name or a DN.
There are quite a few fields but you can leave some blank
For some fields there will be a default value,
If you enter '.', the field will be left blank.
-----
Country Name (2 letter code) [AU]:CH
State or Province Name (full name) [Some-State]:Zurich
Locality Name (eg, city) []:Zurich
Organization Name (eg, company) [Internet Widgits Pty Ltd]:Geekers Digest
Organizational Unit Name (eg, section) []:
Common Name (e.g. server FQDN or YOUR name) []:www.geekersdigest.com
Email Address []:

Please enter the following 'extra' attributes
to be sent with your certificate request
A challenge password []:
An optional company name []:
The CSR file (geekersdigest.com.csr) can now be used at a CA (such as Sectigo, Digicert and others) to order a new certificate.
Or you can yourself issue your own certificate – see the following chapter.
Self-Signed certificate
With the CSR you can issue your own certificate. As this is not a "validated" certificate by a known CA (Certificate Authority), this type of certificate is called a "self-signed" certificate.
By using the sub command x509, a new certificate can be created. In the following example the validity is set to 365 days, uses a sha256 hashing algorithm, uses your own Private Key as signkey, reads in the CSR and saves the final certificate in an output file:
$ openssl x509 -req -days 365 -sha256 -signkey geekersdigest.com.key -in geekersdigest.com.csr -out geekersdigest.com.crt
Signature ok
subject=C = CH, ST = Zurich, L = Zurich, O = Geekers Digest, CN = www.geekersdigest.com
Getting Private key
Congratulations! You just created your own self-signed certificate which is saved in the newly created file geekersdigest.com.crt.
Certificate verification and troubleshooting
Sometimes you might have to troubleshoot problems with certificates. Was the correct certificate installed? Is the CA chain matching the server certificate? The following commands will help you investigate.
Checking a Private Key
A simple check of the Private Key (e.g. syntax errors, missing dashes, etc) can help identify an invalid Private Key:
$ openssl rsa -in geekersdigest.com.key -check
RSA key ok
writing RSA key
-----BEGIN RSA PRIVATE KEY-----
MIIEogIBAAKCAQEArnZdOfbyDjLed61ov41IIyN78KenY9N1/+V1PGaS3YzyNwar
[...]
akvkyl0ut4j2/vWrNxulZYQ4gL6vY6jRsvwm4Zawrc/zMDsJ0Hg=
-----END RSA PRIVATE KEY-----
Another helpful command is the following which shows the full contents of a Private Key, including the bit-length of the key:
$ openssl rsa -noout -text -in geekersdigest.com.key
RSA Private-Key: (2048 bit, 2 primes)
modulus:
    00:ae:76:5d:39:f6:f2:0e:32:de:77:ad:68:bf:8d:
    48:23:23:7b:f0:a7:a7:63:d3:75:ff:e5:75:3c:66:
    92:dd:8c:f2:37:06:ab:41:7e:34:c9:8c:56:3b:82:
    f4:af:24:5a:ca:97:ec:00:41:59:80:89:44:cc:da:
    fc:99:03:27:a9:6b:5e:9e:d8:6a:d1:b8:f9:c6:32:
    fc:78:24:53:14:c9:7c:34:b4:64:0a:7c:15:f2:16:
[...]
Checking a CSR
To show the data stored in the CSR, the following command is very helpful:
$ openssl req -noout -text -in geekersdigest.com.csr
Certificate Request:
    Data:
        Version: 1 (0x0)
        Subject: C = CH, ST = Zurich, L = Zurich, O = Geekers Digest, CN = www.geekersdigest.com
        Subject Public Key Info:
            Public Key Algorithm: rsaEncryption
                RSA Public-Key: (2048 bit)
                Modulus:
                    00:ae:76:5d:39:f6:f2:0e:32:de:77:ad:68:bf:8d:
                    48:23:23:7b:f0:a7:a7:63:d3:75:ff:e5:75:3c:66:
[...]
Checking a certificate
To view the contents of a certificate, including the date the certificate was issued and when it expires, the following command is a great helper:
$ openssl x509 -text -in geekersdigest.com.crt
Certificate:
    Data:
        Version: 1 (0x0)
        Serial Number:
            02:b4:12:ef:86:6f:ab:a3:5d:ad:64:eb:c2:09:6a:ca:59:64:c9:58
        Signature Algorithm: sha256WithRSAEncryption
        Issuer: C = CH, ST = Zurich, L = Zurich, O = Geekers Digest, CN = www.geekersdigest.com
        Validity
            Not Before: Nov 26 07:52:23 2021 GMT
            Not After : Nov 26 07:52:23 2022 GMT
        Subject: C = CH, ST = Zurich, L = Zurich, O = Geekers Digest, CN = www.geekersdigest.com
        Subject Public Key Info:
            Public Key Algorithm: rsaEncryption
                RSA Public-Key: (2048 bit)
                Modulus:
                    00:ae:76:5d:39:f6:f2:0e:32:de:77:ad:68:bf:8d:
[...]
Checking if Private Key, CSR and Certificate match
When handling lots of different certificates and renewals, installations might be messed up. For example if a certificate was renewed, but with a different Private Key than the original certificate, and only the new certificate is installed on an Apache web server, Apache will refuse to restart and show an error similar to "private key does not match certificate".
To find out whether Private Key and Certificate belong together, the "modulus" of them can be compared. If they match, they belong together. This also applies to the CSR.
The following command shows only the modulus of Key, CSR and Certificate in the output:
$ openssl rsa -noout -modulus -in geekersdigest.com.key
Modulus=AE765D39F6F20E32DE77AD68BF8D4823237BF0A7A763D375FFE5753C6692DD8CF23706AB417E34C98C563B82F4AF245ACA97EC004159808944CCDAFC990327A96B5E9ED86AD1B8F9C632FC78245314C97C34B4640A7C15F216C59F4301C04BDD09E16E459712F86E9F1337E90C7993F6DD185B73BDDEAEA410E089189727EC60F66AE786BAC977540461FA34413ED42A39F271B6649716806C6C51037EBB01DA8CD7576639A998494E267A3533A3463B8A3965C60C9E7D68D97B09EEFCFE86D2CCC8B6F2337E31D0676543A5ED848AB82E9F104466E6B6DBCE02C7890719DA3523C1C22AC58563068BF0D9A25AC8D07A6F531D9E6B63B3DE05B75646F872951D

$ openssl req -noout -modulus -in geekersdigest.com.csr
Modulus=AE765D39F6F20E32DE77AD68BF8D4823237BF0A7A763D375FFE5753C6692DD8CF23706AB417E34C98C563B82F4AF245ACA97EC004159808944CCDAFC990327A96B5E9ED86AD1B8F9C632FC78245314C97C34B4640A7C15F216C59F4301C04BDD09E16E459712F86E9F1337E90C7993F6DD185B73BDDEAEA410E089189727EC60F66AE786BAC977540461FA34413ED42A39F271B6649716806C6C51037EBB01DA8CD7576639A998494E267A3533A3463B8A3965C60C9E7D68D97B09EEFCFE86D2CCC8B6F2337E31D0676543A5ED848AB82E9F104466E6B6DBCE02C7890719DA3523C1C22AC58563068BF0D9A25AC8D07A6F531D9E6B63B3DE05B75646F872951D

$ openssl x509 -noout -modulus -in geekersdigest.com.crt
Modulus=AE765D39F6F20E32DE77AD68BF8D4823237BF0A7A763D375FFE5753C6692DD8CF23706AB417E34C98C563B82F4AF245ACA97EC004159808944CCDAFC990327A96B5E9ED86AD1B8F9C632FC78245314C97C34B4640A7C15F216C59F4301C04BDD09E16E459712F86E9F1337E90C7993F6DD185B73BDDEAEA410E089189727EC60F66AE786BAC977540461FA34413ED42A39F271B6649716806C6C51037EBB01DA8CD7576639A998494E267A3533A3463B8A3965C60C9E7D68D97B09EEFCFE86D2CCC8B6F2337E31D0676543A5ED848AB82E9F104466E6B6DBCE02C7890719DA3523C1C22AC58563068BF0D9A25AC8D07A6F531D9E6B63B3DE05B75646F872951D
As you can see from the Modulus output, all three files match.
Checking if the certificate chain is valid
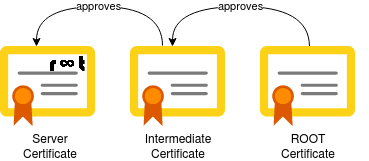
When using certificates which were issued by a CA (Certificate Authority), you (should have) also received so-called ICA (Intermediate Certfificate Authority) or Root CA certificates. This builds the "chain of trust" to validate the server certificate which was issued to you.
To manually check whether or not the ICA and Root CA certificates are valid, you can run the verify sub command. The following command checks if the server certificate (wildcard.geekersdigest.com) was indeed issued by the issuer's CA certificate (CAfile):
$ openssl verify -verbose -CAfile GandiStandardSSLCA2.crt wildcard.geekersdigest.com.crt
wildcard.geekersdigest.com: OK
If a wrong CA file was used, the output clearly shows the certificate chain is not valid. Here we use our self-signed certificate to validate against the CA certificate of Gandi:
$ openssl verify -verbose -CAfile GandiStandardSSLCA2.crt geekersdigest.com.crt
C = CH, ST = Zurich, L = Zurich, O = Geekers Digest, CN = www.geekersdigest.com
error 18 at 0 depth lookup: self signed certificate
error geekersdigest.com.crt: verification failed
Certificate format conversions
In the previous chapters we've created and handled certificates in the PEM format, which is the default format for most environments – especially in Linux/Unix and Cloud environments. But the certificates can be converted into different formats, too. This is necessary when working with Java (Keystore) or Windows servers.
Convert DER to PEM format
The DER format is often used in verious operating systems and is a binary file. This means the certificate cannot be viewed with a text editor. To convert a DER formatted certificate, use the following command:
$ openssl x509 -inform der -in geekersdigest.com.crt -out geekersdigest.com.pemImportant here is the additional -inform der input. It tells openssl that the source (-in) certificate is a DER formatted certificate.
Convert PEM to PFX format
The PFX format is used in Windows servers and requires a passphrase. The PFX format contains key and certificate(s) in one file. This also means that the Private Key must be at hand to create a PFX certificate.
The pkcs12 sub command allows to convert a PEM formatted key and certificate to PFX:
$ openssl pkcs12 -export -out geekersdigest.com.pfx -inkey geekersdigest.com.key -in geekersdigest.com.crt
Enter Export Password: ****
Verifying - Enter Export Password: ****
The newly created file (geekersdigest.com.pfx) can now be imported and used in Windows servers (e.g. in IIS).
Convert PFX to PEM format
Of course the other way around is also possible. The pkcs12 sub command allows to export the PFX into the PEM format – however by default it would create a single password-protected file with both key and certificate(s) in it.
In the following example, only the Private Key is exported from the PFX:
$ openssl pkcs12 -in geekersdigest.com.pfx -nocerts -out geekersdigest.com.key
Enter Import Password: [enter passphrase of PFX]
Enter PEM pass phrase: [enter a new password for the PEM key]
Verifying - Enter PEM pass phrase: [verify new password for the PEM key]
To remove the passphrase from the newly created key file:
$ openssl rsa -in geekersdigest.com.key -out geekersdigest.com.key-without-pass
Enter pass phrase for geekersdigest.com.key: [enter passphrase of PEM key]
writing RSA key
$ mv geekersdigest.com.key-without-pass geekersdigest.com.key
And now the pkcs12 sub command is used again to export the certificate(s) from the PFX:
$ openssl pkcs12 -in geekersdigest.com.pfx -clcerts -nokeys -out geekersdigest.com.crt
Enter Import Password: [enter passphrase of PFX]
Convert PFX to JKS format
The JKS format is used in Java applications, which use a Java Key Store to manage keys and certificates. The following keytool command can be used to convert a PFX into a JKS keystore:
$ keytool -importkeystore -srckeystore geekersdigest.com.pfx -srcstoretype pkcs12 -srcstorepass 1234 -destkeystore geekersdigest.com.jks -deststoretype jks
Importing keystore geekersdigest.com.pfx to geekersdigest.com.jks...
Enter destination keystore password: [enter a new password for the key store]
Re-enter new password: [verify new password for the key store]
Entry for alias 1 successfully imported.
Import command completed:  1 entries successfully imported, 0 entries failed or cancelled
Note that the above command has created a new Java Key Store, holding only the Private Key and Certificate of geekersdigest.com.
To import a PFX into an existing keystore (in the following example we use the geekersdigest.com.jks key store which was just created above), use the following keytool command:
$ keytool -importcert -file geekersdigest.com.crt -keystore geekersdigest.com.jks
Enter keystore password: [enter passphrase of key store]
Questions and Answers
Size/Length of the Private Key
Q: Which size should I use for the Private Key?
A: A size of 1024 (bit) is deemed insecure by NIST since 2015. Certificate issuers will not issue any certificate anymore when a 1024 bit Private Key was used to create the CSR. The next logical size is 2048 bit, which is still deemed secure as of this writing. Of course there is also the possibility to go further and create a 4096 bit Private Key, however this uses significantly more resources (CPU) for data encryption and decryption – which results in slower response times. Right now the recommended Private Key size is 2048 bit.
Let's Encrypt
Q: Do I need to run any openssl commands when I use Let's Encrypt?
A: By using free Let's Encrypt certificates, the openssl commands are handled by a third-party command, such as certbot or dehydrated. This means you don't need to manually launch any openssl commands to issue Let's Encrypt certificates.
Browser warnings with self-signed certificates
Q: My browser shows a big warning when I attempt to visit a website with a self-signed certificate.
A: This happens because the browser uses an internal list of "known" certificates. Only these certificates and server certificates issues by these known certificates are deemed secure. To make your browser accept the self-signed certificate, you need to import it into the browser or even the Operating System.


[…] you are working with self-signed SSL/TLS certificates, e.g. in your internal test or lab environment, the communication is well encrypted but you have […]