As with all HTTP errors, 401 errors are frustrating because of how little diagnosis information there is to go on. They can happen regardless of your browser, so the issue is quite common. The good news is that it's often a simple and easy fix.
This article will clarify what 401 error messages are and why they occur. Then, it will present three approaches to solving them. For additional information, have a look at this beginner-friendly 401 error guide.
What is the 401 error?
You get a HTTP 4xx status code when a problem with a request occurs. Specifically, the 401 error occurs when the browser does not provide access to a page you want to open. Instead the browser asks for authentication and loads an error message, often displayed as a prompt for entering a username and password, instead of the web page.
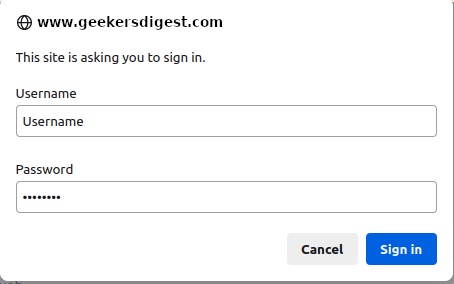
The 401 prompt is often placed on purpose in front of sites which require restricted access, such as an administrative part of a CMS or an Intranet.
However if you get an unexpected 401 error on a site which should not require authentication, check out the following possible solutions.
1. Check for errors in the website address
You'd be surprised, but many times, people just type in the wrong URL. It could also be that the address you're using is directing you to the wrong URL. It might lead to a nonexistent page where no redirects were set up or could simply be invalid. Make sure you spelled the address correctly, and if you click on a link, make sure it leads to the page you want to visit. Alternatively, go to the website's home page and try to open the page from there.
2. Clear your cache
Browser caches reduce loading time, thereby improving the visitor's online experience. Sadly, nothing is perfect, and the cache can sometimes cause unwanted disruption. Incorrect or outdated cache data is among the most common causes of the 401 error. Clearing your browser's cache is the logical next step if you entered the right website address.
This will eliminate any invalid data that the browser stores locally, which could be getting in the way of authentication. Likewise, your browser's cookies' data might need to be refreshed.
The cache is cleared differently depending on the browser. If you use Google Chrome, you need to go to the menu icon in the top-right-hand corner and then go to Settings. Under Privacy and Security, click on Clear browsing data.
A new window will open. Check the three boxes under the Basic tab, then go to Clear Data.
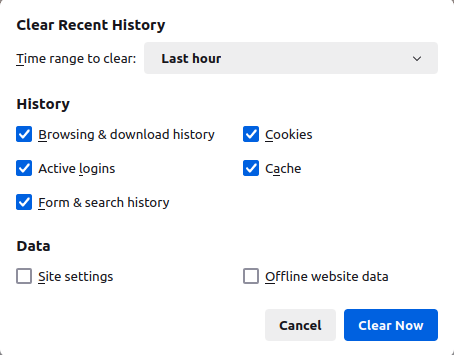
If you use Mozilla Firefox, go to the library icon in the top-right-hand corner, then go to History, followed by Clear Recent. You'll see a drop-down menu at the top of the panel that opens next. Click on Everything here. Select cache, then proceed to click on the Clear Now button.
3. Deactivate WordPress plugins
If your browser isn't the reason for the 401 error and your site is running the WordPress CMS, it might be caused by a plugin. This is very likely if you are having a hard time accessing your own WordPress site. Security plugins, in particular, are set to list a 401 error when they detect suspicious login activity, which they perceive as an attempted attack. See our related article how to improve security in your WordPress site for more information.
In other cases, a compatibility issue is causing the error. It's always advisable to deactivate all of your WordPress plugins to see if that helps.
To do this:
- Go to the WordPress dashboard and select Plugins > Installed Plugins.
- Choose all plugins by checking the box at the top.
- Go to Deactivate under the Bulk Actions menu and click on Apply.
This deactivates all your plugins at the same time.
You can check if that resolved the issue by reloading the page that returned the 401. Then, you can begin reactivating the plugins. Do so one at a time to find out which one caused the problem. When you determine that, remove the plugin and replace it with a new one.
